Friday, December 31, 2010

Top 10 of 2010

Even as I start this post I know it is going to kill me to have to choose just 10. I considered counting how many layouts, cards and projects I made in 2010, but I know it's in the hundreds so I thought better of it. This task alone was going to be difficult enough.

So here goes: My 10 favorite cards, layouts and projects from 2010. (In no particular order...)


OK, that was nearly impossible to choose, but I'm going to stick by this list. I always want to pick my most recent work, so I decided that since they were for the January 2011 kit for Scrapbook Circle that they were off limits. That helped a little. :)

So, what were your Top 10 for 2010? Link up your post in my comments and I'll swing by and see what you picked.

HAPPY NEW YEAR'S EVE!!!! I hope you are welcoming in 2011 with a bang! :)

Thursday, December 30, 2010

Cute apron card


So, I've seen some cute apron-shaped cards out there and have been wanting to try one myself. I didn't have a template to use, so I used my imagination and a Martha Stewart Scoring Board and figured it out all by myself! :) Not too shabby, right?!

I gave this card to my MIL for Christmas to go with a gift card for a cooking class. All packaged together with the class schedule and the gift card, it made for a cute gift. Better than a plain envelope, right?!


All of the supplies for this card (except for the top pink ribbon) are from the January kit from Scrapbook Circle. Did you get one for yourself yet? :)

Thanks for stopping by my blog today!!

Wednesday, December 29, 2010

Too big, too fast


Here is another sample page using the January kit from Scrapbook Circle. I can't stress enough how pretty and eye-catching the papers are in this kit. The range from soft and romantic to fun and whimsical is amazing.

And who would've thought pink for a boy page, but I love how this turned out and the papers work together perfectly.


My dear little man is growing way to fast. I snapped these pictures as I was helping him get ready for some outdoor snowy fun. He was standing with his hands in his snow pants pockets and the green in his shirt was making his hazel eyes pop.

I just had to take a few pictures. He looked more like 14 than 4.


The alphas in this kit are so fun, too. They are foam, but the glitter in them makes them easier to use than the plain foam ones. And the embellies... so cute! Great transparency, rub-ons and stickers. Fun!!

OH... and this page was made using the Design Dollies sketch from last Thursday. I just love their sketches!! So easy to work with and make your own. (Thanks, ladies for doing what you do so well!!)

Thanks for reading my blog today, I truly appreciate you stopping by to see what I make!!

Tuesday, December 28, 2010

Frosty and who would've thought...


I love this page! I know I say that often lately, but I really do love this. Never in a million years would I have chosen this paper from Glitz on my own. When I saw it in my Scrapbook Circle January kit, I loved it, but thought twice about how to use it for my pictures of Nate.


Then Nate built this snowman. Ha! If you can call it that!!

We had our first big snowfall of the season and out into the backyard Nate went with his Snowman Making Kit to create the first Frosty of the season. He managed a 9" tall mound of snow before he wanted to call it quits. We decorated that little pile anyway and víola... FROSTY!

He looks melty, but a Frosty nonetheless.


Over on the Scrapbook Circle blog today I share how I made the shimmery snowflakes on the page. It may seem pretty easy and obvious to some people, but I felt pretty smart when I figured it out, :) !!

Thanks for reading my blog today. I have another fab Scrapbook Circle January kit page for you tomorrow. This kit is just so pretty!! If you haven't gotten one yet, and you are in the market for a kit, check this one out!!

Monday, December 27, 2010

Nifty, easy home decor


I have been dying to share this with you! I made it for my Mom for Christmas, but she subscribes to my blog... HI MOM! So, I wasn't able to share it with all of you until after I knew she had gotten her gift.

My mom has a craft room at her house and has been a sewer and crafter all her life. I am me because of her. :) I made this with the thought that she could hang it in her crafting space.


To make this, I bought a ceramic plate at Hobby Lobby, then stamped using Black Staz-On ink. The sewing machine is Maya Road and the sentiment is Hero Arts.

Next time you're in a craft and hobby store, swing by and check out the ceramics. I know I'll be back to Hobby Lobby soon looking for more ideas like this.

Have a great week, and thanks for reading my blog today!

Sunday, December 26, 2010

Scrapbook Circle and an exclusive challenge


Hello! I hope everyone had a great holiday and is set to have some free time soon.

I made this page using the new TOP SECRET sketch for Sketchy Thursdays that can only be found on the Facebook Fan page! That's right! Play over there for a chance to win a nifty holiday-themed kit courtesy of Sketchy Thursdays.


And I also used my Scrapbook Circle kit for January. Such a pretty and vibrant kit!! It goes on sale today, I believe, so make sure to scoot over to the store and scoop one up for yourself.


This is also my last kit for Scrapbook Circle as a Design Team member. I am soooo sad, and have been taking my time making pretty creations to share with you. I have loved every moment working with Lisa and the DT over the past year. Such a wonderful kit club to belong to!! I hope you'll consider subscribing. The kits are beautiful each and every month.

Saturday, December 25, 2010

Merry Christmas!


Wishing you and yours a wonderful holiday season!
Love, The Fishers


Digi elements: Picnik, Jingle Jangle (2Peas) digi kit, Sassy Designs mask


Friday, December 24, 2010

Snowman soup


Here is a great little idea I got from Valerie at the Inspired to Scrap site. She posted Snowman Soup over there and I instantly saved it to my brain for Nate to make for his Pre-K teachers.

He did this all on his own! I cut the paper with the border punch and stapled the paper to the bags, but he did the rest—filled the bags, wrote the tags and did the stickers. (PS: The kraft tags are from {embellish*ology} and they are fab!)

If you need a quick gift for a party this weekend, these were super fast to make, even for a four year old!

And, today is Christmas Eve! I love today—Nate gets to see Santa tonight at our family party. This is also the first Christmas Eve that my husband has to work. Big bummer! But he does have Christmas Day off this year, so that's good. Last year he worked Christmas Day, so this is OK. Compromises, right?! :)

If you celebrate the season... Merry Christmas from my family to yours!!

Thursday, December 23, 2010

Special Sketchy Thursdays Facebook challenge


Wanna win this fabulous kit courtesy of Sketchy Thursdays? Well, you can't win... heck, you can't even PLAY if you don't LIKE Sketchy Thursdays on Facebook.

Starting Dec 23 and lasting through Jan 5, you can link your entry to the secret sketch found only on the Sketchy Thursdays Facebook page.

Link your blog post or photo of your page to the Sketchy Thursdays Facebook page before 10 p.m. (EST) on Jan. 5 to be eligible to win this wonderful prize.

And do us a favor... don't re-post the sketch on your blog when you play along with us!! We want to keep this super top secret for our Facebook friends.

Thanks for playing along with us! And Happy Holidays from your friends at Sketchy Thursdays!

Wednesday, December 22, 2010

Ornaments and alcohol inks


I love this ornament! I saw this tutorial from Tim Holtz where he used alcohol inks and a can of compressed air to add color to the inside for a plain glass ornament. I used a frosted glass ornament for mine, and he uses clear glass for his. I also added Perfect Pearls to the red and blue inks I used, where he used inks with glitter (which I didn't have). The Perfect Pearls helped to add the shimmer.

The funny part about this ornament... You know when you lay down a hollow ornament like this it kind of sways a bit. Well, because of the inks being tossed around by the compressed air, it unevenly distributes. My ornament falls to the side like a rock! HAHA!! Most of the ink must have settled on one side. It looks unnatural and sorta funny.

Thanks for stopping by to see my ornament! I hope you'll watch the video from Tim Holtz. I'm sure if you were to try and make a few of these this week for extra gifts, you could get a really great deal. Everything should be marked down right now. Or stock up for next year!

Tuesday, December 21, 2010

DIY glass ornaments


Hello! Today I'm sharing with you an ornament I made using a do-it-yourself glass ornament, ribbon and rub-ons. These rub-ons are from Crate Paper Snow Days, and they came in the December kit from Scrapbook Circle.


This ornament was super easy to make. The rub-ons from Crate Paper work really well. They don't need too much rubbing to adhere on the glass and don't flake off.

If you've never worked with ornaments like these before, you can get them at most craft and hobby stores. The top comes off easily for you to add something inside the ornament. But be careful, it better be small because the opening is limiting.

Thanks for stopping by to see my ornament today. I actually have another ornament for you tomorrow, too. Have a good day!!

Monday, December 20, 2010

My Fave Things favorite page challenge

I absolutely love when These Are a Few of My Favorite Things challenge blog does their final challenge of the year. The DT shares their favorite pages from the past year and asks you to do the same.

Nothing new needs to be created, just a great moment to reflect on 2010 and share what you think was your best page/moment/journaling/design, etc.

And, of course, this isn't really an easy challenge. I always want to choose 5-10 pages not just one. And I almost always want to choose my most recent page. I tend to usually think that each page is better than the last. Keeping that in mind, THIS LAYOUT HERE is the one I really wanted to choose. :)

So here it is.... (drum roll.....) ... my favorite page of 2010!


OK, this was not an easy choice at all! Here's why I chose this one:
• It has the clouds that I was so in love with in 2010.
• It has the sequence of pictures which I also liked doing.
• There are border punches, especially my favorite Martha Stewart one.
• And there is journaling about something cool Nate was really into at the time (a must for any best page).

Plus, this was a Labor Day page, believe it or not! I liked the irony of Nate dressed up as a pirate for Labor Day and that I used Halloween papers to illustrate his costume. He was Iron Man for Halloween, and that was a completely different layout.

Thanks for stopping by today!! I hope you'll show off your favorite page for 2010 and link it up with TAAFOMFT.

Friday, December 17, 2010

Jolly ol' Saint Nick card


Ho, Ho, Ho! I just love this Santa Claus from Squigglefly. I find myself using him over and over again this holiday season.

The background is embossed with one of the newer Basic Grey embossing plates from Sizzix. And here are the Copics I used to color Santa.


I also have some cool news! I made the 2011 Design Team for The Sampler.


Visit the site to see who else made the team, and to start your shopping list! You know I love a great scrapbooking store! :)

Thanks for stopping in today! I hope everyone has a wonderful weekend planned. The holidays are almost upon us! One more shopping weekend left! Is anyone trying desperately to finish a handmade gift? I'd love to hear about it!! LMK in the comments section!

Thursday, December 16, 2010

Sketchy Thursdays and small holiday moments


Hello! Happy Sketchy Thursday! Take a look this week at the latest sketch and prize by heading over to Sketchy Thursdays. As always, the DT did a fabulous job with the sketch. I'm inspired by their work each week—it gets better and better!

This week's page is about how I took Nate to Starbucks a few weeks ago for a surprise. He had no idea where I was taking him, just that I'd promised him something fun. I let him choose a to-go mug (he picked the one with little Huxley the mouse in the bottom), there was hot cocoa for him and a gingerbread latte for me, and shared a sandwich and croissant.

Beforehand we'd done the make 'n' take reindeer ornament at Michael's, and then after we met friends to go see Tangled. It was a day that started at 9 a.m. and ended at 7 p.m. We were exhausted and starting to wear on each other, but it was a wonderful day. This small moment with hot drinks the best part!


I picked up a kit from the Paper Poppy Kit Co. during their Black Friday sales. I'm so glad I did, too, because this kit was fabulous. I'm sad to say, though, that Paper Poppy Kit Co. is closing it's doors. I really did love this kit!


Thanks for reading my blog today! I really, really love this page and have been excited to share it with you. I hope I've inspired you to plan a special trip or even just to take a picture or two during a simple moment. These are the times that count, aren't they?!

Wednesday, December 15, 2010

Snowman holiday card


A week or so ago I saw this free embroidery download on Craft Gossip. If you're comfortable using digital files, free patterns of any kind can be used for making cards. Run a Google search for different types of digital downloads and see the wonderful variety you'll find.

Below are the Copics I used to color in the dear of snowman.


Thank you for joining me for my holiday cards week. Tomorrow is Sketchy Thursdays (yeah!), so I'll have a layout for you. And it's one of my favorites, so I am really excited to share it with you.

Tuesday, December 14, 2010

Crate Paper birdhouse and exciting news

I'm so excited to also let you in on a cool project I made.

Over on the Scrapbook News and Review site I am a guest blogger with a wonderful little birdhouse tutorial made with Crate Paper Snow Day from the Joyful Kit at Catch The Moments Kits.


This same birdhouse is also in the running for the Crate Paper Happy Holidays Blog Event! Yippee!! I could win a super large box of surprise Crate Paper goodness. In all honesty, I am just so happy to even be included as a project in the running. :)


Thanks for stopping by to see my birdhouse today. I hope you'll stop by SNR to see the tutorial. It's a step-by-step lesson in constructing this, fit for any happy little bird!


Monday, December 13, 2010

Holiday card and matching tag


Hello! I hope everyone is set to have a great Monday. This week I want to share with you some holiday cards.

I really like this matching card and tag set. I used Distressing Ink - Tea Dye to make the die cuts match the Graphic 45 paper I used on the card. I love the old world look of St. Nick and the vintage style of the 5 cent candy sentiment from Papertrey Ink.

Next time you make a card, take a second and make a matching tag.

Thanks for stopping in today!

Saturday, December 11, 2010

Love the look of kraft


There is just something elegant while also simple about using Kraft for your holiday projects. I was recently directed to a nifty little place called The Kraft Journal.

They have a prompt up now to use Kraft in your holiday projects... well, that was no problem! :)

It was also nice to get away from green and red for a holiday card. Gotta love the pop of teal and pink here!!

Thanks for stopping by today! If you're using kraft in your holiday projects, link your creation to my blog comments. I'd love to stop by and see what you're working on!

Friday, December 10, 2010

Inspired to Scrap news and opportunities

There's some nifty things going on at Inspired to Scrap that you may be interested in.

First is that the Journaling Class started this past Wednesday with my post on journaling spots. I have designed and offered up an exclusive downloadable journal spots PDF for those taking the class. It's available in black & white as well as color.


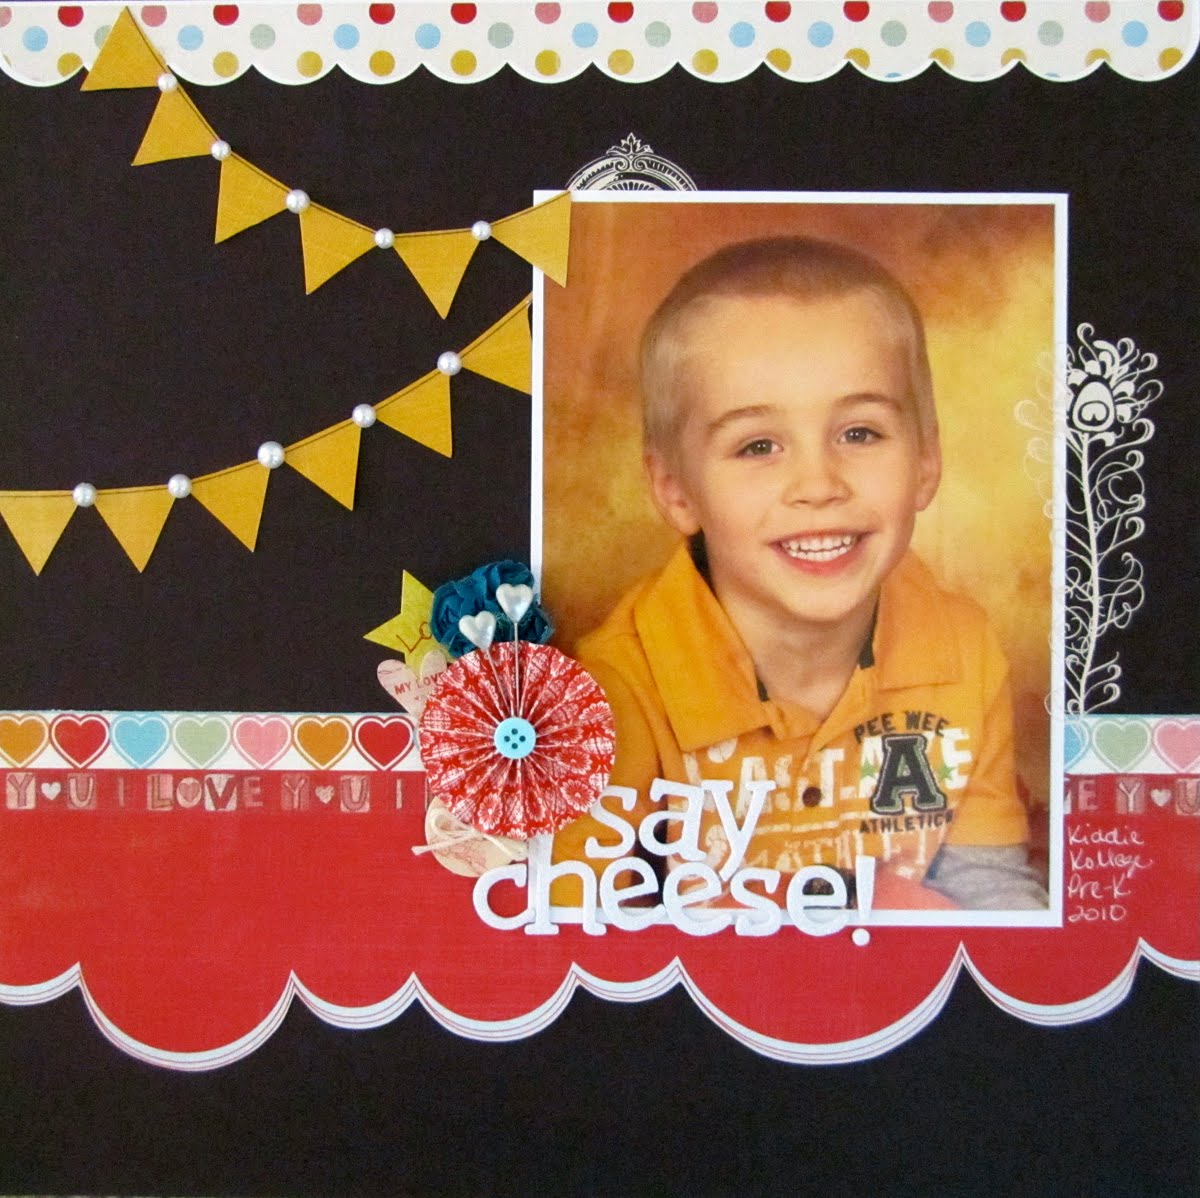
This is a sneak of my sample page for the first day's challenge. Lots of goodness going on here! And it's not too late to join the fun. Head over to I2S to sign up for this month's class on journaling.

Second, there is a Inspired to Scrap Design Team call. I have enjoyed my time with Stacey and the I2S gang, and I believe you would, too.

The details are below:
Inspired to Scrap (www.inspiredtoscrap.net) is looking for designers!! No experience on a design team is required and everyone is encouraged to apply. Please join our message board so we can get to know you. The term will be for 4 months (January-April 2011).

Designers will be asked to help plan and create sample layouts for classes, teach techniques, create blog posts, participate in challenges, post regularly on the message board, and promote Inspired to Scrap on their blogs and elsewhere.

As a thank you, designers will receive the equivalent of two kits, free classes during their term, one free class following their term, and they will be highlighted on the design team page of the website.

Please submit the following information to stacey{at}inspiredtoscrap.net by December 20, 2010 with “Design Team” in the subject line.

1. Your name, mailing address and email address
2. Your blog and/or a link to your online gallery
3. A list of online communities you are active in.
4. Two layouts plus an additional project (layout or altered item) that reflect your current style.
5. A blurb about why you’d like to be a designer and what you can bring to the team.
6. Would you be willing to serve as a guest designer if we don’t have room for you this time as a regular DT member?

Thanks and we look forward to getting to know you and seeing your wonderful work.
Call is open to scrappers in the U.S. and Canada. Thanks!

*****************

I hope you'll consider applying! I was excited to be able to plan so many great ideas and follow through on them in a class-style setting. It was a great experience for me (thanks, Stacey!!!)

I hope everyone is set to have a wonderful weekend! What do you have planned?! Anything scrappy? Holiday fun? Have a good one!!

Thursday, December 9, 2010

Sketchy Thursdays, a new super hero and great kit deals!


Sketchy Thursdays is live with a new sketch for you, and I hope to see you over there! Check out the DT's pages, the sketch, and the fabulous prize from a brand new kit provider Catch The Moments Kits.

I had so much fun using this latest sketch. I had captured some funny pictures of Nate a week or two ago as he was using his fabulous imagination. He was wearing his turkey feathers from a school project, a plastic cape and his Buzz Lightyear, Space Ranger pajamas.


With that... the super hero aptly named Super Turkey Ranger was briefly born. And since forgotten. But for this one moment, I was loving the new super hero. I can't wait to see what he thinks up next.


One thing I am really excited about for this Christmas is Nate's new cape. We made his current cape from a garbage-bag-like material while we were at a Super Hero Day at the museum in the summer. It has a orange tape 'N' on the back. He wears it EVERY DAY! No kidding! Every. Single. Day.

I couldn't pass up the opportunity to order him a reversible kids cape from Etsy. I haven't hinted or anything about it. It will have a Spider Man on one side and a Batman on the other. I can't wait!! It's the big surprise gift from Santa this year. I think I may be more excited to give it to him than he can possibly be to receive it.


Thanks for stopping by today. I hope you scoot on over to Sketchy Thursdays and join us this week. You won't want to miss the chance at the Catch the Moments Kits prize!!

Catch the Moments Kits is having a fabulous sale right now. And I mean fabulous!! I already scooped up one kit and some Thickers. See the sale HERE!

Wednesday, December 8, 2010

A simple holiday card with a twist


We all do it (if you live in a four-seasons climate). We all take pictures of our trees covered in snow. Especially that first snow, before everything is slushy and murky and it looks like heaven blanketed our backyards.

With that in mind, my idea for simple holiday cards is to print out those snowy photos on paper and use them on your cards. In my case, I printed the picture in black and white on white paper then die cut using Nestabilities.


The tag is also cut from the Nesties and a rub-on added to it. This card came together quite quickly and can easily be mass produced if need be. And you don't need to use your photo paper—the effect is gorgeous on simple paper.

Thanks for visiting today! If you posted your mass-produced holiday cards to your blog, link it up in the comments section. I want to visit your page and leave some love!